This is a step by step guide to get your StreamRoll overlays connected to Streamer.bot.
1. Get signed up at StreamRoll.io
You should already have an account if you got this far — if not, head to streamroll.io and log in with Twitch or Google.
2. Import the example actions into Streamer.bot
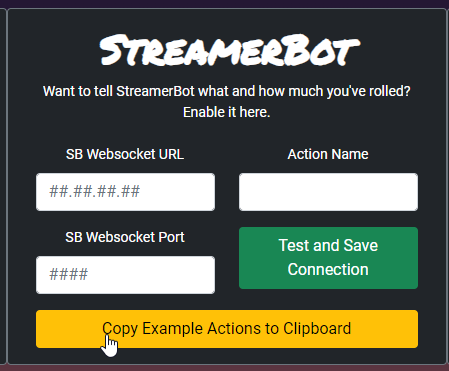
Once logged in, go to the Tools tab and find the StreamerBot section. Use the copy button to copy the import code to your clipboard.
Then paste it into Streamer.bot using Import to load the example actions.
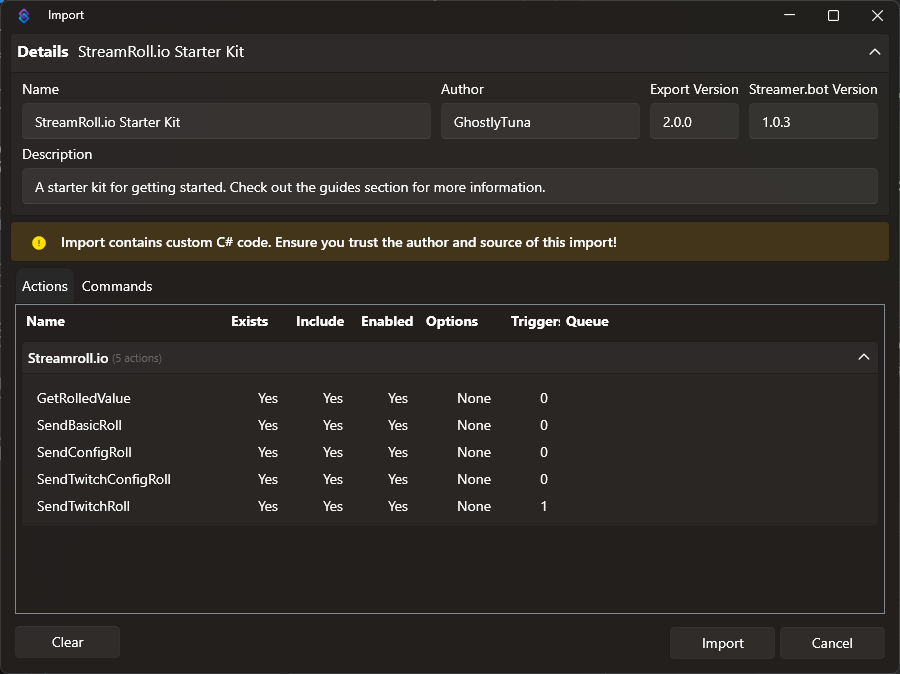
The imported actions and what they do:
- GetRolledValue — reads the roll result back from the overlay into Streamer.bot.
- SendBasicRoll — sends a fixed roll to the overlay.
- SendTwitchRoll — like SendBasicRoll but pre-wired to a Twitch event (channel points, chat command, etc.) and includes the triggering user.
- SendConfigRoll — triggers a named roll config instead of a fixed roll.
- SendTwitchConfigRoll — like SendConfigRoll with the Twitch event wiring already set up.
3. Enable the Websocket Server in Streamer.bot
Make sure you are enabling the Websocket Server tab specifically — there are other websocket-related tabs in Streamer.bot; using the wrong one will prevent the actions from connecting.

4. Enter your websocket details in StreamRoll
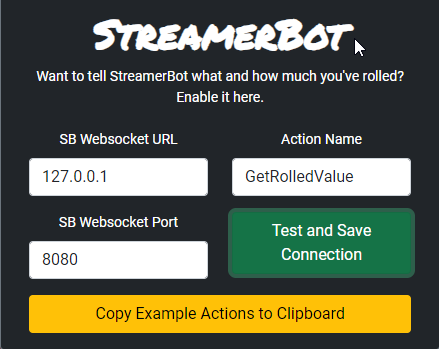
On the StreamRoll controls page, enter your websocket server address and add GetRolledValue as the listener action.
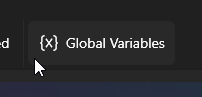
5. Set your UUID as a Streamer.bot global variable
Using a global variable means you only need to set your UUID once and all actions will pick it up automatically.
Find your UUID on the StreamRoll options page and paste it in.
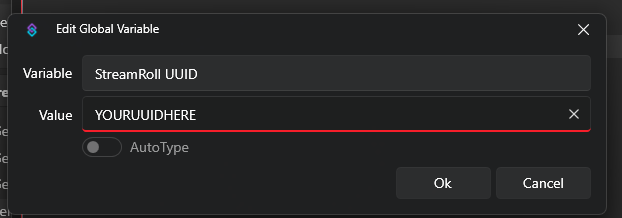
Make sure it is spelled exactly StreamRoll UUID — the actions look for this specific variable name.
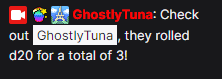
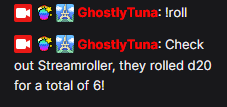
6. All set — trigger away!
The example below uses a chat command !roll, which triggers the action and outputs the result via SendRolledValue.
The same roll using SendTwitchRoll, which additionally captures the Twitch event context: